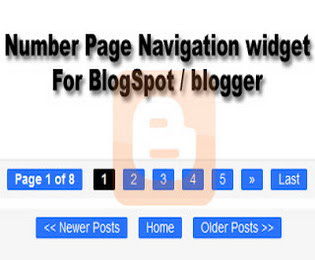
Page Navigation widget is the need of every blogger template. we see
that different blogger templates have different styles of page
numbering navigation bar. It commonly appeared below in all posts on the
home page of a blog. This widget helps in jumping to previous posts of a
blog or turning to newer posts by single click. However you might have
noticed that some professional blogger using numbering pagination widget
along with newer post and older post button. This will only turn our
blog design to professional looks but it will also helps to jump easily
from page 1 to page 5 by single click. Previous day we have received
several comments from our reader they want to know is there any way to
add customize pagination widget with numbers along with the older post
and newer post buttons. So to make them happy with best answer i was
thinking why not to share a complete tutorial on adding customize
numbering widget to blogger. So, in this article we will show you how
to add number page navigation widget in blogger blogspot.
- You might Like: Create More than 20 static pages in Blogger
Add Number Page Navigation Widget in Blogger
follow the below simple steps to add this widget in your blog. Please follow all the steps carefully to add this widget in blog. Let go how to add this numbering widget in blogger blog.Step1:
- Go to blogger Dashboard:
- Go to template>>Edit/Html:
- Now find for the below code:
<b:includable id='mobile-index-post' var='post'>
- Now past the below given code before the above line:
<b:includable id='page-navi'>
<div class='pagenavi'>
<script type='text/javascript'>
var pageNaviConf = {
perPage: 7,numPages: 5,firstText: "First",
lastText: "Last",
nextText: "»",
prevText: "«"
}
</script>
<script type="text/javascript" src="http://yourjavascript.com/815315225/www.mybloggerblog.com.js"></script>
<div class='clear'/>
</div>
</b:includable>
Step2:
- Now find for this code
<b:include name='nextprev'/>
- Now Replace the above code with the below given code:
<b:if cond='data:blog.pageType == "index"'>
<b:include name='page-navi'/>
<b:else/>
<b:if cond='data:blog.pageType == "archive"'>
<b:include name='page-navi'/>
</b:if>
<b:else/>
<b:if cond='data:blog.pageType == "item"'>
<b:include name='nextprev'/>
</b:if>
</b:if>
Step3:
- Now find for ]]></b:skin> tag
- Now copy the below given code and past before ]]></b:skin> >> See the screenshot
#blog-pager, .pagenavi {
clear: both;
text-align: center;
margin: 30px auto 10px;
}
#blog-pager a, .pagenavi span, .pagenavi a {
margin: 0 5px 0 0;
padding: 2px 10px 3px;
text-decoration: none;
color: #fff;
background: #2973FC;
-moz-border-radius: 2px;
-khtml-border-radius: 2px;
-webkit-border-radius: 2px;
border-radius: 2px;
-webkit-transition: all .3s ease-in;
-moz-transition: all .3s ease-in;
-o-transition: all .3s ease-in;
transition: all .3s ease-in;
}
#blog-pager a:visited, .pagenavi a:visited {
color: #fff;
}
#blog-pager a:hover, .pagenavi a:hover {
color: #fff;
text-decoration: none;
background: #000;
}
#blog-pager-older-link, #blog-pager-newer-link {
float: none;
}
.pagenavi .current {
color: #fff;
text-decoration: none;
background: #000;
}
.pagenavi .pages, .pagenavi .current {
font-weight: bold;
}
.pagenavi .pages {
color: #fff;
background: #2973FC;
}
Now Click On Save Button And you done almost:


unnecessary steps have been very difficult to get filled which teases people to register. But now as https://fr.altoconvertpdftoppt.com/reviewsreviews has come in the market they have eliminated such steps. By this it will save time.
ReplyDeleteYour good knowledge and kindness in playing with all the pieces was very useful. I don’t know what I would have done if I had not encountered such a step like this iptv uk
ReplyDelete